
You play guitar every day, yet the pieces you’re working on never seem to come together. Even when you practice longer, you keep stopping at the same spot.
In this article, instead of making practice longer, I explain how to redesign what goes into your 15 minutes, in four steps.
This is for classical and solo guitarists who want to finish pieces in a limited amount of time. Come and experience a lifelong practice blueprint for yourself.
- Players who can’t practice for long every day
- Players who keep stumbling at the same spots
- Players who feel their practice has no real method behind it
Guitar Practice: Frequency and Content Matter More Than Length
Many people assume they aren’t improving because they don’t practice long enough, so they try to lengthen each session. But long sessions are hard to keep up, and they can even reduce how often you pick up the guitar at all.
I believe the first thing to do is not to make practice longer, but to create as many chances as possible to touch the guitar.
To do that, I keep practice to a short 15 minutes and design what goes into it so you can put it into practice as efficiently as possible.
The 15-Minute Practice Blueprint | 4 Steps
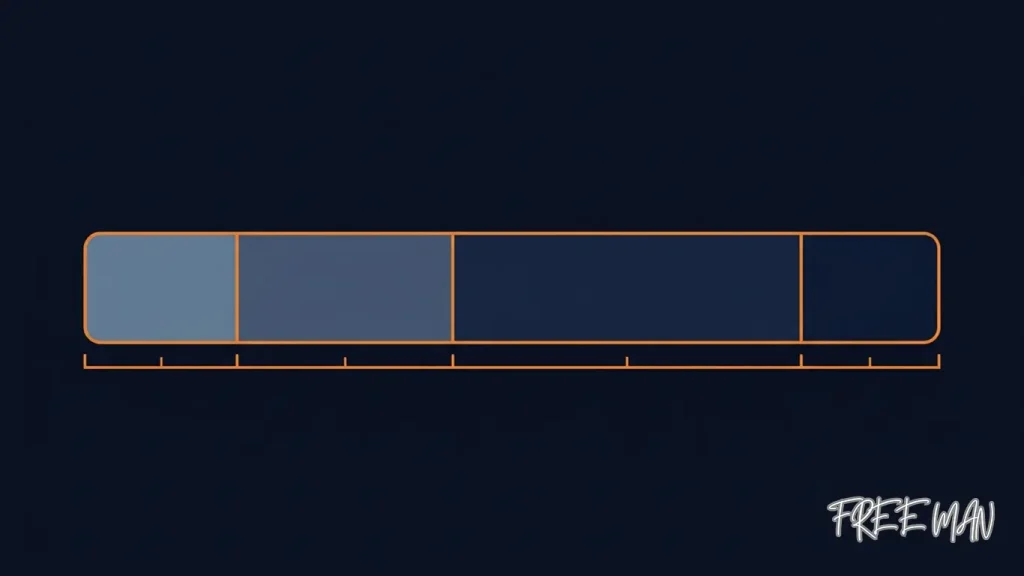
The 15 minutes you spend on guitar practice are built from the following four parts.
- Tuning | 1 minute
- Warm-up | 3 minutes
- Main training | 9 minutes
- Review and polish | 2 minutes
Step 1: Tuning | 1 Minute
Tune your guitar using the open strings.
When tuning from string 6 to string 1 with a tuner, it picks up overtones, so mute the other strings as you tune.
Finally, check the sound with a chord, and fine-tune it here if anything is off.
Even if you tune using only the open strings, some pitch drift remains once you actually fret a string.
In my blueprint, I use “Eadd9,” a chord where the guitar’s overtones ring out easily and the pitch is easy to check.
It’s easy to think of it as just tuning, but because it involves both fretting strings and open-string overtones, it turns out to be a surprisingly deep task.
If the tuning isn’t set correctly, no amount of practice will give you a good performance, so be careful!
Step 2: Warm-Up | 3 Minutes
Warming up before you practice matters just as it does in sports. In a short time, cycle through two types at a steady tempo.
Arpeggio Warm-Up
Use every finger of your right hand and play each one independently.
It is designed so that all your fingers are used in balance and connect smoothly to the next note.
Melody Warm-Up
To make the melody stand out, play it with appoyando (rest stroke).
Play first with your ring finger (a), then with your middle finger (m) on the repeat, and check the sound with both fingers.
Don’t just play fast and call it done. Check the sound and your finger movements as you go.
The goal isn’t to play, but to get your fingers used to it and check your condition for the day.
Bonus: Checking Your Nails
This warm-up section also lets you check the condition of your nails.
If you hear noise such as snags or roughness in the sound, shape your nails, then finish by repeating at a faster speed.
Step 3: Main Training | 9 Minutes (Isolation Practice)
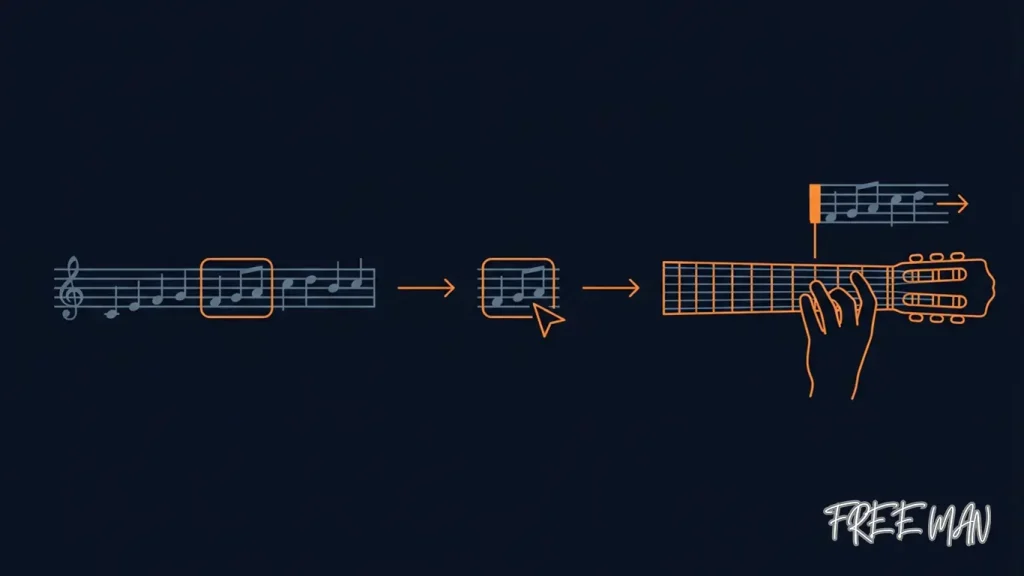
Most of your time goes to the main training. Here, you don’t repeat full run-throughs.
The piece you use in the main training is whatever you are working on right now.
If you hold a Freeman Guitar System license, such as the Matsu Plan, those pieces apply.
Before playing a piece through, first break it into three roles.
- Melody line
- Bass line
- Harmony
Check how each one moves.
This is the framework of the piece.
If you can’t see the framework and practice by running through the piece, the spots where you get stuck will keep happening in the same places every time.
Once you’ve checked the framework, do “isolation practice” with the following steps.
- Section off the phrase where you got stuck, in units of 2 to 4 measures
- Repeat only that block at a slow tempo until you can play it accurately
- Once you can play it accurately, connect it with the phrases before and after to check
- Bring the blocks you’ve perfected individually back to the original tempo little by little, and link them in a full run-through
This “isolation practice” (fixing only the spots where you get stuck) looks like a detour at first.
But I believe it is, in the end, the fastest way to polish the whole piece.
Here, for the first time, you should feel yourself getting closer to a smooth, hesitation-free performance.
Step 4: Review and Polish | 2 Minutes
The last two minutes are for reviewing today’s results and polishing the finer details.
- Play the spots you did isolation practice on today once more, one at a time, and check them
- Play through the piece just once, and check with your own ears the clarity of each note, the dynamics, and how your phrases end
If any spot falls apart when you check it on its own, there’s a good chance you’ll get stuck in the same place tomorrow and beyond, so be sure to check here.
This time is less about fixing and more about polishing.
Watch the 15-Minute Practice Blueprint Demonstrated on Video
I explain the thinking behind the 15-minute practice blueprint and demonstrate it in the video. The score for the section used in the video is also shown there.
Get the Full Version of the 15-Minute Practice Blueprint
This article and the video cover the thinking behind the blueprint and part of the demonstration.
The full version covering every part is yours for free with an email sign-up.
After you sign up, I’ll send you emails over five days. Please check the details on the sign-up form below.
Summary | Design Your 15-Minute Guitar Practice
Practice changes not by making it longer, but by designing what’s in it.
Your precious 15 minutes of guitar practice are built from these four parts.
- Tuning (1 minute)
- Warm-up (3 minutes)
- Main training (9 minutes): see the framework and isolate the spots where you get stuck
- Review and polish (2 minutes)
That makes a 15-minute practice design in total.
What matters is not playing through again and again, but isolating only the spots where you get stuck and fixing them.
Start with today’s 15 minutes.