
The day I stopped moving my classical guitar fingers “all at once,” my sound changed.
Why?
Practice the classical guitar right hand with p, i, m and a all together, and your sound hits a ceiling at some point. You can play the piece, yet it sounds flat. The melody doesn’t step forward. In most cases the cause is the same: your fingers aren’t moving independently.
This article explains why you should practice your right hand “separately,” with a clear exercise for each finger.
Why Practice Each Finger Separately
In classical guitar, there’s a saying that the right hand matters more than the left.
The left hand presses the strings and sets the pitch.
But it’s the right hand that actually sounds the note.
- Which finger plays
- How hard you play
- When you strike the string
Those choices shape your tone. And how you sound the guitar is, in the end, your greatest form of self-expression.
Many beginners practice p, i, m and a all at once. They memorize an arpeggio pattern until the four fingers “sort of move on their own.” You can play pieces this way.
But sooner or later, you hit four walls:
- Every note sounds the same
- The melody doesn’t stand out
- The bass is thin
- The high notes get buried
All four share one cause: your fingers aren’t independent.
What Each Finger Does
On the classical guitar right hand, p, i, m and a each have a different job.
p: the thumb
It handles the bass strings and builds the foundation of the music. Ruling the bass line is p’s job.
When the thumb is steady, your whole performance gains weight. When it wavers, the playing wobbles no matter how well the other fingers move.
i: the index finger
The index finger often plays the inner notes of an arpeggio. Together with m, it creates the rhythm and motion of the music.
m: the middle finger
The middle finger drives the arpeggio. Its steadiness sets the tempo and evenness of the whole pattern.
It also plays a key role in strong, powerful melody lines. (That’s my own approach.)
a: the ring finger
The ring finger most often carries the melody.
Whether a moves independently decides whether your playing has a singing voice. It also shines in high-register tones and fast arpeggios.
When all four fingers move with their own intention, your sound gains expression.
It isn’t electronics doing the controlling. Your own fingers express everything.
Why Uniform Sound Falls Flat
Practice all four fingers together, and every finger ends up with the same volume and timing.
Uniform sound rarely feels musical, because music is built on contrast.
- Some notes step forward, others pull back
- The melody sings
- The bass supports
- The inner voices move
Without that separation, playing sounds flat, however accurate it is.
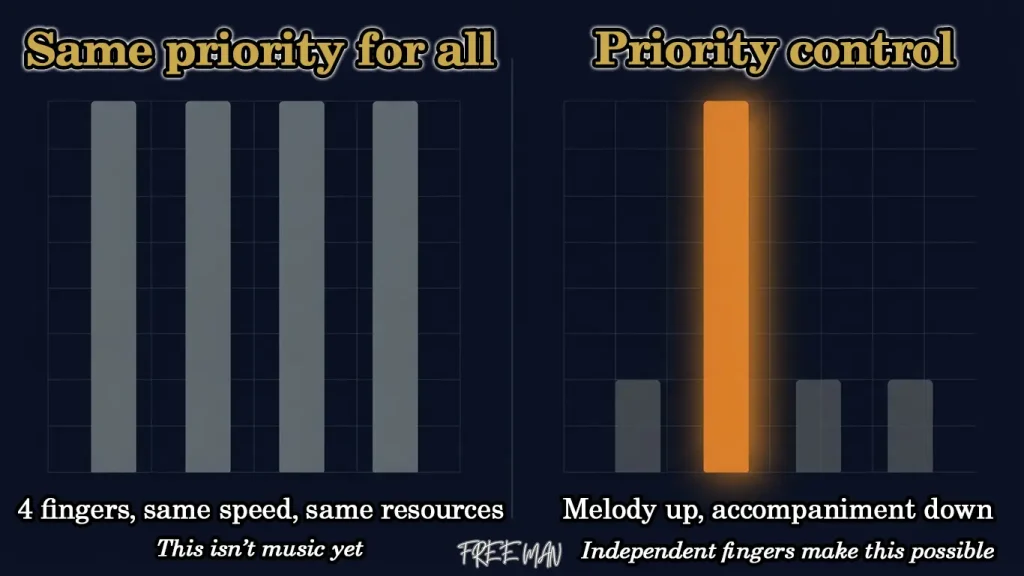
Think of it like a computer. Practicing all four fingers together is like four processes running at the same priority: same speed, same resources.
But music needs priority control. Raise the melody, hold the accompaniment back. That control only becomes possible when each finger is independent.
Classical Guitar Right Hand Exercises
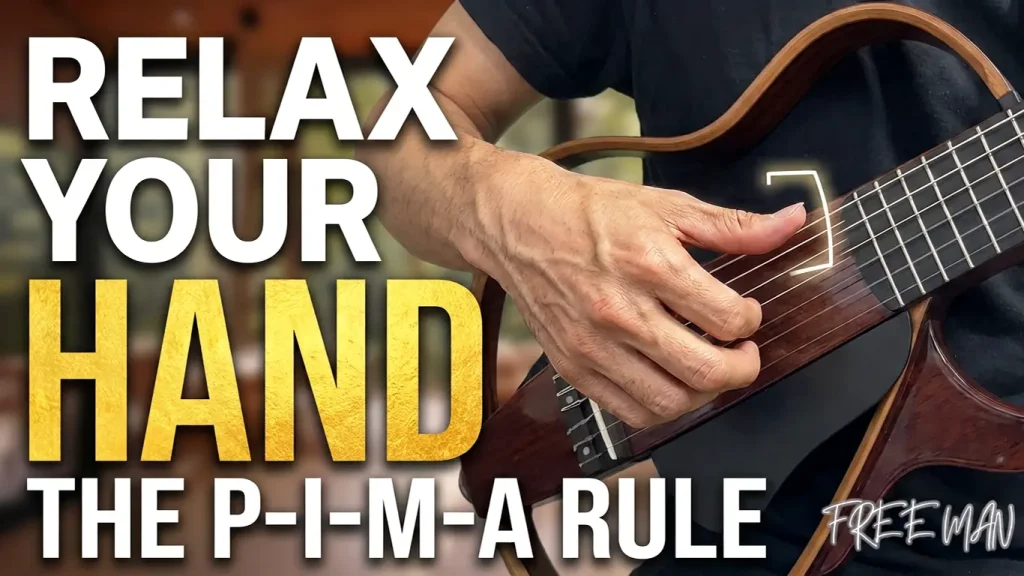
Start every exercise with a relaxed right hand. Tension makes arpeggios and tremolo harder, not easier.
If you feel pain or discomfort in your fingers or wrists, stop right away and rest.
Thumb (p): Own the Bass
Start by focusing on p alone.
- Play the bass strings (6th, 5th, 4th) with p only
- Keep the other fingers still (touching the strings is fine)
- Focus on how steady p’s volume and tone can be
The key skill is choosing between apoyando (rest stroke) and tirando (free stroke).
Use apoyando for bass accents and tirando for fast passages. Practice making that call with p alone, over and over.
Index and Middle (i–m): Alternating
Alternating i and m is the heart of the arpeggio.
- Alternate i and m on a single string
- Start slowly, with a metronome
- Repeat i → m → i → m until both fingers sound equally even
Many players find m weaker, often because it’s less independent than i.
Add practice where you play m deliberately stronger, and the two fingers even out. That evenness leads directly to smoothness in fast passages.
Ring Finger (a): Let the Melody Sing
Training a to move independently takes the longest.
It’s the finger you use least in daily life, and it tends to move with m, so moving it alone is hard.
Yet in classical guitar, an independent a is essential, because it usually carries the melody.
Pluck with a alone while keeping the other fingers perfectly still. It will feel unnatural at first, but this practice gives your melody its singing voice.
What Changes After You Separate the Fingers
Your Notes Gain Intention
Keep up the individual finger training, and one day your sound suddenly feels intentional.
- The bass played by p feels grounded
- The melody played by a steps forward
- i and m keep the accompaniment even and musical
You’ll hear yourself and think, “That’s music,” or “That doesn’t sound like one guitar.” That’s the sign your fingers are becoming independent.
Polyphony Starts to Work
Many classical pieces have several voices moving at once.
In Bach, the melody, inner voice and bass move independently. Playing that on one guitar demands fully independent fingers.
And Bach wasn’t a guitarist, so these works are demanding to play.
Finger independence is the groundwork for polyphony. Without it, even a challenging piece turns into a muddle of mixed voices.
This isn’t about taking on difficult pieces. Think of it as a road you need to travel to express yourself as freely as possible on a single guitar.
Building a Right-Hand Foundation
The Ume Plan at Freeman 365 Studio
The Ume Plan builds a solid right-hand foundation across seven pieces. This set is dedicated to one goal: building your right-hand OS.
Each piece has a clear role:
- A piece focused on the thumb (p)
- A piece focused on even i–m motion
- A piece focused on an independent ring finger (a)
- A piece that brings them all together
Instead of repeating drills, you build skill systematically through real pieces. They are efficient enough to present in concert, too.
I want to enjoy the guitar fully, and I don’t want to waste a single second of practice.
Practice the seven pieces in the designed order, and your four fingers learn to move independently. None of them is difficult on paper. But practicing with the right purpose builds a steady technical base.
Freeman 365 Studio offers these seven pieces as a practice blueprint designed around purpose. Details are shared after you sign up for the free THE 15-MINUTE BLUEPRINT.
What Comes Next
Once your right-hand foundation is in place, you can move on to:
- Musical expression
- Singing melodies
- Tempo control
All of these depend on independent fingers. No need to rush. Follow the right order and you’ll get there.
Classical Guitar Right Hand FAQ
How long should I practice the right hand?
From experience, short, frequent sessions seem to stick better than long ones. I wrote up how to start with 15 minutes in How to Design a 15-Minute Guitar Practice.

My m and a fingers move together
m and a tend to move together. Make the motion small and slow, and keep the finger you want to hold still relaxed. If pain or discomfort continues, don’t push through it. Talk to a teacher or a specialist.
Does this help electric and acoustic fingerpicking?
Yes. Finger independence is a shared foundation across genres. I cover it in Why the Classical Right Hand Works for Every Guitarist.
Summary: Separate First, Then Combine
For the classical guitar right hand, practice p, i, m and a separately first, then combine them. Design the order, and your sound changes. Start with the 15-Minute Blueprint, your map for practice.