

The beauty of the classical guitar lies not in the left hand — but in the right hand.
Your tone, expression, and musical personality all begin there.
Beginners often focus on chord changes and left-hand fingering,
but to truly produce a beautiful tone, developing right-hand form and touch is essential.
This article focuses on the right hand in classical guitar playing, introducing three key points with practical, beginner-friendly exercises.
Why the Right Hand Matters
- What kind of practice helps you improve faster
- How to train effectively without burning out
- Simple exercises anyone can continue daily
Even if you don’t play classical guitar, this guide is useful for anyone interested in fingerstyle technique.
Why Right-Hand Practice Is So Important
In classical guitar, the hands have distinct roles:
the left hand chooses the notes, and the right hand creates the sound.
Even if a beginner and an expert play the same note, the tone can sound completely different —
warm and mellow, or bright and sharp — depending on these factors:
- The angle of contact with the string
- The speed of the stroke
- The finger pressure
- The shape and touch of the nail
Your right hand essentially shapes the “voice” of your guitar.
Instead of relying on force, it’s about control and sensitivity — the key to producing a truly beautiful tone.
The Basics of the Right Hand: p, i, m, a
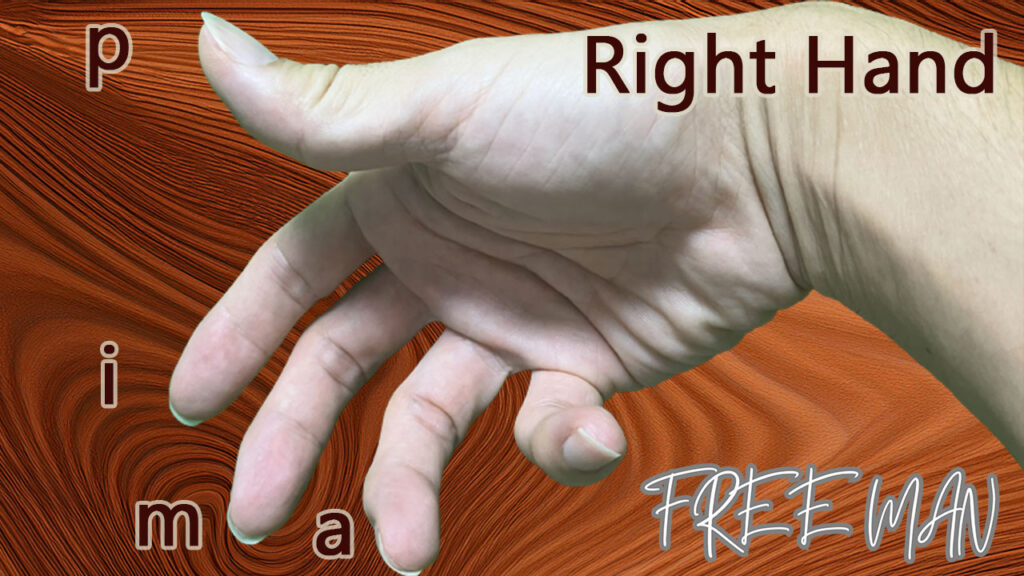
In classical guitar, we use Spanish abbreviations to indicate the right-hand fingers:
| Finger | Symbol | Main Role | Practice Focus |
|---|---|---|---|
| Thumb | p (pulgar) | Bass notes, rhythmic foundation | Build stability in bass tones |
| Index | i (índice) | Melody, arpeggios | Develop rhythmic accuracy |
| Middle | m (medio) | Melodic support | Produce soft, “singing” tones |
| Ring | a (anular) | High notes, ornaments | Refine delicate trebles |
Each finger has a distinct role.
Understanding and training them individually will greatly enhance both tone consistency and expressive control.
For beginners, it’s crucial to learn what each finger does from the start.
Basic Right-Hand Form & Touch
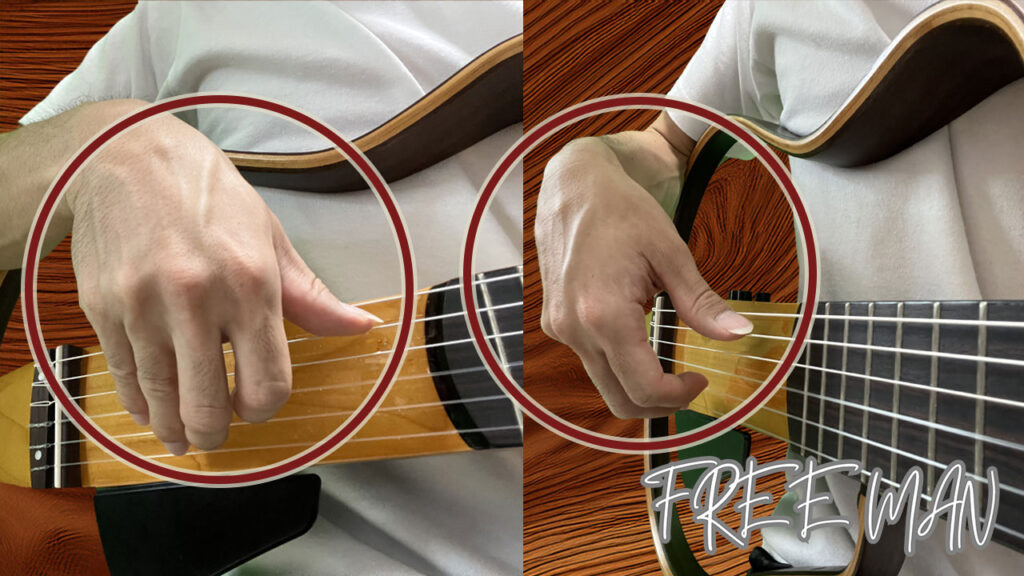
In proper classical guitar posture, your right hand should maintain a natural curve.
Imagine gently holding an egg in your palm — that’s the ideal shape.
Let the fingers touch the strings at a slight angle, keeping the wrist relaxed.
Even if you follow a method book, the key is staying relaxed while maintaining form.
Tips for Beginners:
- Don’t lock your wrist — tension kills resonance.
- Thumb moves forward, i–m–a move inward — think “push” rather than “pluck.”
- Adjust your nail angle — smoother nail contact reduces noise.
Practicing in front of a mirror helps you check your posture and hand shape effectively.
Four Core Approaches to Strengthen the Right Hand
Each right-hand finger serves a unique function.
By practicing them consciously, you can unlock a richer tone palette and stronger rhythm.
Below are four short exercises — one for each finger — suitable for beginners.
① Thumb (p): Building a Solid Bass Foundation
The thumb forms the backbone of your sound.
It defines the “weight” of your tone and must be strong yet flexible.
Practice Tips:
- Strike the string at a slight angle
- Keep the wrist loose; use a gentle snap motion
- Try apoyando (rest stroke) for deeper tone control
💡 Search “thumb exercise for classical guitar” on YouTube to find short etudes.
They’re great warm-ups using only bass strings.
② Index (i): Developing Rhythmic Precision
The index finger is your most used finger in scales and arpeggios.
Focus on evenness and consistent tone.
Practice Tips:
- Alternate “p–i–p–i” on the first string with a metronome
- Listen for even dynamics
- Keep the first joint relaxed — no over-bending
💡 Think of “sliding” across the string rather than plucking.
This creates smoother and faster motion.
③ Middle (m): Creating a Singing Tone
The middle finger brings warmth and singing quality to the melody.
When relaxed and controlled, it gives life to your tone.
Practice Tips:
- Use apoyando to deepen expression
- Let notes ring; don’t lift your finger too soon
- Play slowly while imagining the melodic line
💡 “Mini etudes” or “healing-style pieces” with slow tempo are perfect for this practice.
④ Ring (a): Refining Delicate Trebles
The ring finger is the hardest to control for beginners —
yet it’s essential for bright, expressive high notes and smooth arpeggios.
Practice Tips:
- Avoid forcing movement; feel overall hand balance
- Combine with i–m for coordination
- Gently “brush” the string surface for a softer tone
💡 Practice slow p–i–m–a arpeggios.
After each round, relax your hand completely before repeating.
Tips for Continuing Your Practice
Right-hand control doesn’t change overnight.
Whether you’re a beginner or advanced player, improvement comes from daily focus and listening carefully.
Try building these habits:
- Begin each session with a right-hand warm-up
- Record and review your sound
- Decide what kind of tone you want from each finger
Playing guitar means creating sound, not just hitting notes.
Treat every exercise as a chance to discover your own sound — even the simplest ones will start to sing.
Sheet Music & Further Study
All exercises introduced here are written as short right-hand etudes for beginners.
If you’d like to go further, check out the paid PDF scores (available on Note, Piascore, and Gumroad).
Each piece lasts about a minute — ideal for focusing on tone and control.
Even beginners can clearly feel the difference in sound through guided demonstrations.
(All versions contain the same music.)
Summary: When the Right Hand Improves, the Guitar Starts to Sing
The form and touch of your right hand are the true voice of the classical guitar.
The fastest way to progress isn’t speed or complexity —
it’s listening deeply to each note and finger.
🎯 Key reminders:
- Focus on resonance, not just volume
- Learn the role and habit of each finger
- Practice slowly and consistently
When your right hand begins to feel “alive,”
your guitar will sound like a completely new instrument.
And most importantly — you’ll rediscover the joy of playing and expressing music.
🎸 Check out the Freeman Guitar Channel on YouTube for more lessons and performances!
